Windowで構成されたアプリケーションであればVBSとWin32APIを駆使してある程度操作できたのですが、UWPアプリの操作方法がわからず困ってました。
調べてみたところ、Windows Application Driver (WinAppDriver) というツールを使うことで自動操作が可能であることがわかったので、導入手順および操作手順をまとめておきます。
何がしたいか
- Windowsアプリをプログラムで操作する
- 操作プログラムはPythonでコーディングする
- Pythonの実行環境はAnaconda(Jupyter Notebook)を使用する
ツール概要
Windows Application Driver (WinAppDriver)
Windowsアプリの自動テスト・自動操作を提供するサービス。
ブラウザ自動テスト(自動操作)のデファクトスタンダードであるSeleniumと、ほぼ同等のインターフェースを提供する。
Seleniumの拡張であるAppiumのサーバプロセスと同じように動作するため、WinAppDriverを起動することで、AppiumクライアントからWindowsアプリを操作することが可能となる。
対応OS・対応アプリは以下の通り。
対応OS
- Windows 10
対応アプリ
- Universal Windows Platform (UWP)
- Windows Forms (WinForms)
- Windows Presentation Foundation (WPF)
- Classic Windows (Win32)
Appium
モバイルアプリの自動テスト・自動操作フレームワーク。
Selenium WebDriverの一種であり、HTTPによるWebDriver APIでアプリケーションを操作する。
Java, Objective-C, JavaScript (Node), PHP, Python, Ruby, C#等の言語のクライアントが用意されている。
Anaconda
Pythonのディストリビューション。
Jupyter Notebookやデータ分析用のライブラリなど、よく使われるソフトがインストールされた状態の環境を簡単に構築してくれる。Jupyter Notebookは、ブラウザ上で動作するPythonの実行環境で、プログラムコードとその実行結果を記録しながらコーディングが行えるため、結果を確認しながらコーディングをするような場合に便利。

Inspect Object(Inspect.exe)
Windows SDK for Windows10に含まれる機能の一部。
自動操作で必要となる「操作したいUI要素を特定する情報」を取得するために使用する。

インストール手順
WinAppDriverインストール
WinAppDriverのGitHubからインストーラをダウンロードして実行する。この記事執筆時点であれば、ここからダウンロードしたWindowsApplicationDriver.msiを実行する。
Anacondaインストール
Anacondaのサイトからインストーラをダウンロードして実行する。この記事執筆時点であれば、ここからダウンロードしたAnaconda3-2020.07-Windows-x86_64.exeを実行する。
Appiumクライアントインストール
AppiumのPythonクライアントをインストールする。
condaでインストールしようと思ったのだが、、、
PackagesNotFoundError: The following packages are not available from current channelsとErrorになってしまったので、pipでインストールする。
Anacondaに含まれているAnaconda Prompt (anaconda3)を起動し、開いたプロンプトで以下コマンドを実行する。
pip install Appium-Python-ClientInspect Objectインスト―ル
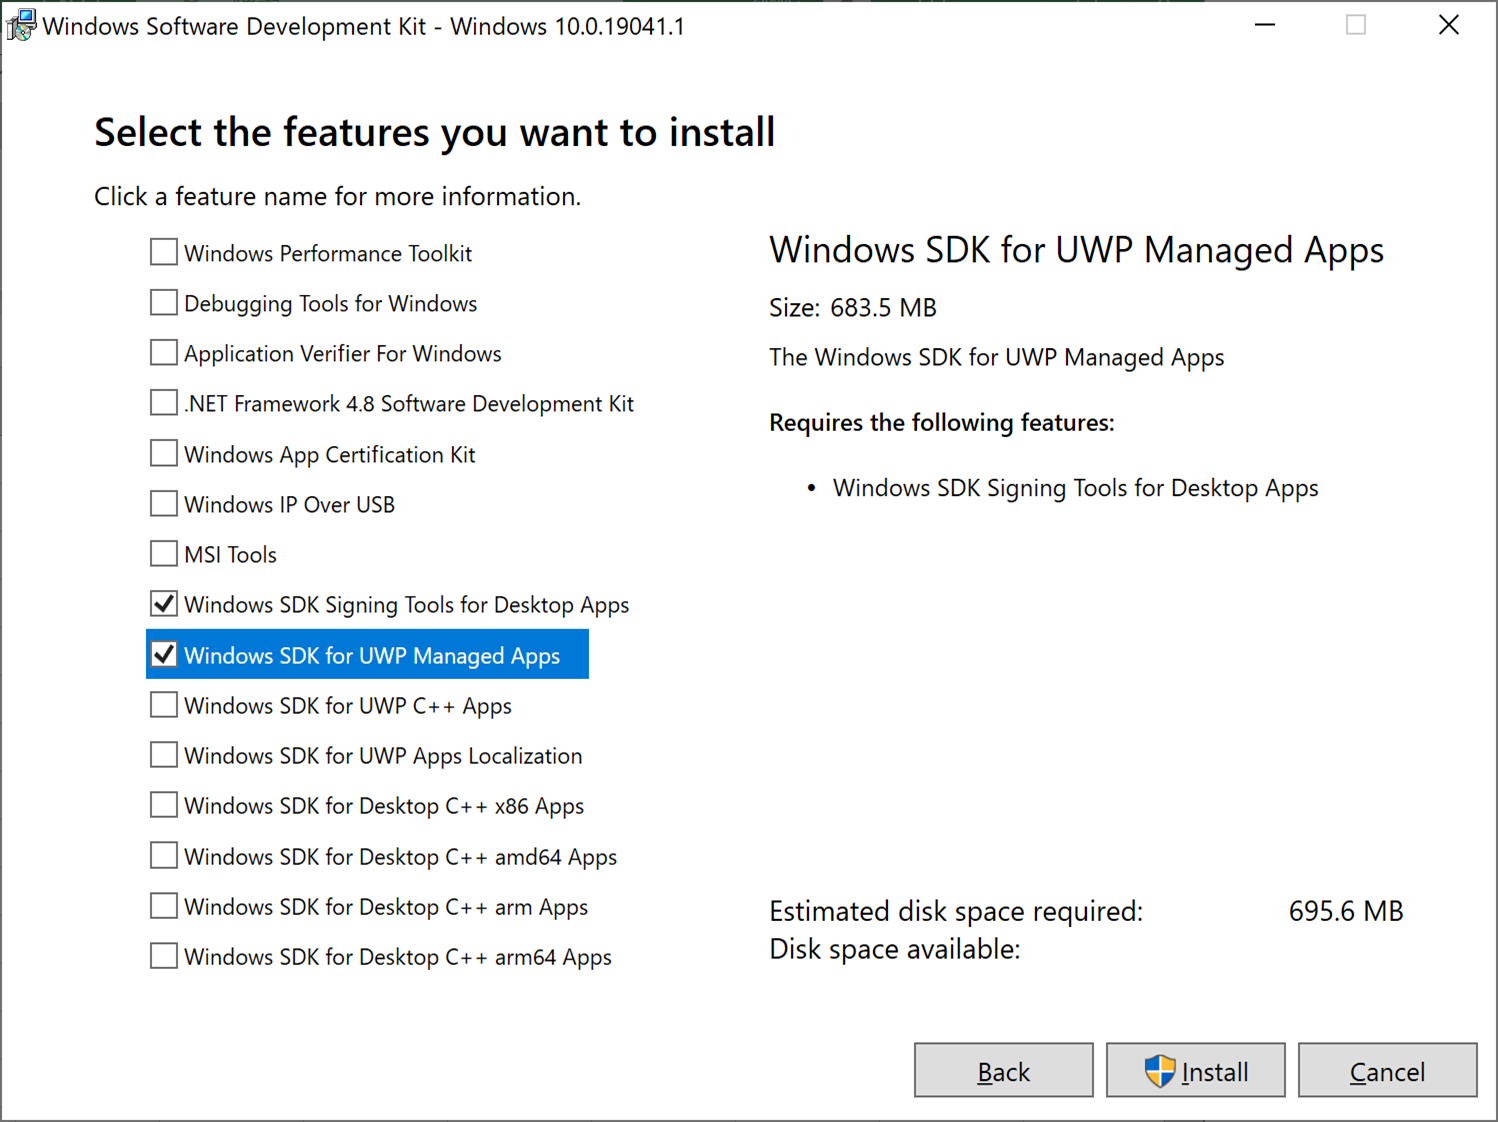
Windows 10 SDKのサイトからインストーラをダウンロードして実行する。この記事執筆時点であれば、ここからダウンロードしたwinsdksetup.exeを実行する。途中で出てくるインストール対象機能を選択する画面ではWindows SDK for UWP Managed Appsだけ選択すればOK。(Windows SDK Signing Tools for Desktop Appsも勝手に選択されるがそのままでよい)
実行手順
WinAppDriver起動準備
WinAppDriverがインストールできていれば、C:\Program Files (x86)\Windows Application Driver\WinAppDriver.exeに実行ファイルが格納されている。
これを実行すればよいのだが、WinAppDriverを起動するためには、Windowsの開発者モードを有効にする必要がある。無効のままだと以下のようにエラーとなる。
C:\Users\xxxxx>"C:\Program Files (x86)\Windows Application Driver\WinAppDriver.exe"
Developer mode is not enabled. Enable it through Settings and restart Windows Application Driver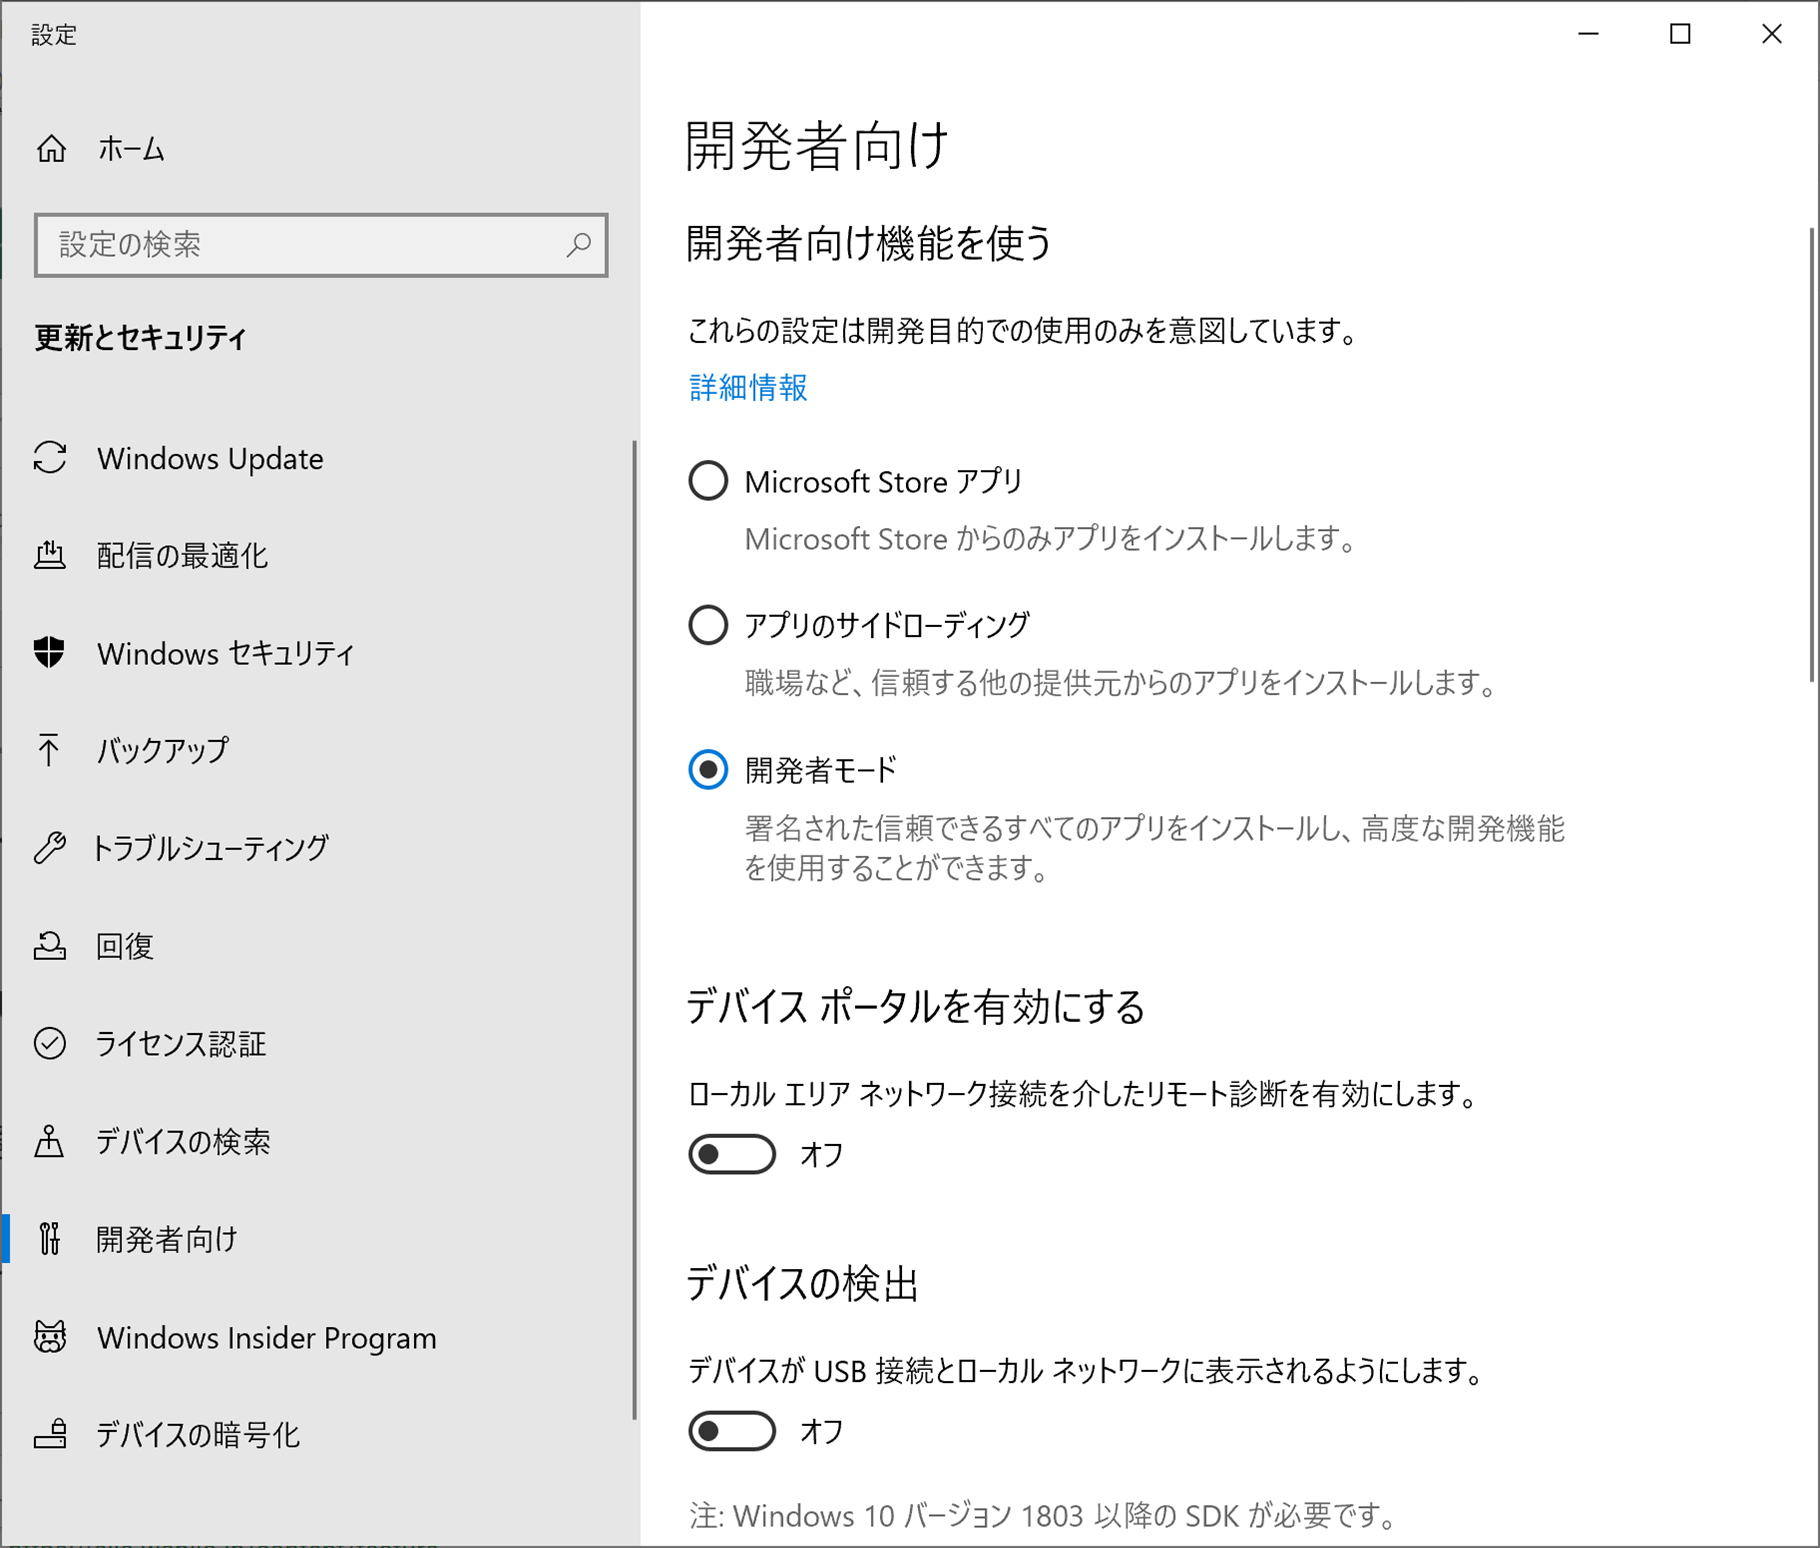
Failed to initialize: 0x80004005開発者モードを有効にするには、スタート > 設定 > 開発者向け で開く画面で、開発者向け機能を使うで開発者モードを選択すればよい。
コマンドで有効化する場合は以下のようにレジストリを更新すればOK。
powershell -command start-process 'cmd.exe' '/c reg add "HKEY_LOCAL_MACHINE\SOFTWARE\Microsoft\Windows\CurrentVersion\AppModelUnlock" /v AllowDevelopmentWithoutDevLicense /t REG_DWORD /d 1 /f' -verb runaspowershellを起動しているのは、管理者権限でコマンドを実行するため。
コマンドプロンプトを管理者モードで起動していれば、以下コマンドでOK。
reg add "HKEY_LOCAL_MACHINE\SOFTWARE\Microsoft\Windows\CurrentVersion\AppModelUnlock" /v AllowDevelopmentWithoutDevLicense /t REG_DWORD /d 1 /fWinAppDriver起動
開発者モードが有効になっていればWinAppDriverが起動できる。
C:\Users\xxxxx>:WinAppDriver起動 → 失敗
C:\Users\xxxxx>"C:\Program Files (x86)\Windows Application Driver\WinAppDriver.exe"
Developer mode is not enabled. Enable it through Settings and restart Windows Application Driver
Failed to initialize: 0x80004005

C:\Users\xxxxx>:開発者モード確認(0x0:無効)
C:\Users\xxxxx>reg query "HKEY_LOCAL_MACHINE\SOFTWARE\Microsoft\Windows\CurrentVersion\AppModelUnlock" /v AllowDevelopmentWithoutDevLicense
    AllowDevelopmentWithoutDevLicense    REG_DWORD    0x0

C:\Users\xxxxx>:開発者モード有効化
C:\Users\xxxxx>powershell -command start-process 'cmd.exe' '/c reg add "HKEY_LOCAL_MACHINE\SOFTWARE\Microsoft\Windows\CurrentVersion\AppModelUnlock" /v AllowDevelopmentWithoutDevLicense /t REG_DWORD /d 1 /f' -verb runas

C:\Users\xxxxx>:開発者モード確認(0x1:有効)
C:\Users\xxxxx>reg query "HKEY_LOCAL_MACHINE\SOFTWARE\Microsoft\Windows\CurrentVersion\AppModelUnlock" /v AllowDevelopmentWithoutDevLicense
    AllowDevelopmentWithoutDevLicense    REG_DWORD    0x1

C:\Users\xxxxx>:WinAppDriver起動 → 成功
C:\Users\xxxxx>"C:\Program Files (x86)\Windows Application Driver\WinAppDriver.exe"
Windows Application Driver listening for requests at: http://127.0.0.1:4723/
Press ENTER to exit.
ポートの待ち受け状態の確認
C:\Users\xxxxx>netstat -ano | find "4723"
  TCP         127.0.0.1:4723         0.0.0.0:0              LISTENING       4
接続可能かの確認
C:\Users\xxxxx>powershell "test-netconnection 127.0.0.1 -port 4723 | %{$_.TcpTestSucceeded}"
True
Inspect Object起動
Windows 10 SDKがインストールできていれば以下に実行ファイルが配置されている。
C:\Program Files (x86)\Windows Kits\10\bin\<version>\<platform>\inspect.exe使い方はInspect Objectを起動した状態で、対象アプリの調べたい要素をマウスでクリックするだけ。詳しい使い方は公式サイトを参照
Anaconda起動
Anacondaに含まれているJupyter Notebook (anaconda3)を起動する。
New > Python 3でノートブックを作成しコードを書いていく。Appiumクライアントの使い方やDocumentationは以下を参照

アプリの起動+操作
公式のサンプルに倣い、電卓アプリを操作します。
from appium import webdriver

desired_caps = {}
desired_caps["app"] = "Microsoft.WindowsCalculator_8wekyb3d8bbwe!App"
driver = webdriver.Remote(
    command_executor='http://127.0.0.1:4723',
desired_capabilities=desired_caps)コード中に出てくるMicrosoft.WindowsCalculator_8wekyb3d8bbwe!Appは、電卓アプリのショートカットです。
参考

この部分はexeファイルのフルパスでも動く。。。。と思ったのですが、試したところ電卓は起動したのですがExceptionが発生してしまいました。
WebDriverException: Message: Failed to locate opened application window with appId: C:/Windows/WinSxS/amd64_microsoft-windows-calc_31bf3856ad364e35_10.0.18362.1_none_7c1b713697f466dd/calc.exe, and processId: 20276一応メモ帳でうまくいくことは確認できました。原因がわかれば更新します。
driverが生成できたらこれを使うことで電卓アプリを操作できます。以下は電卓の1ボタンを押す操作です。
なお、1ボタンを特定する方法(ここではIDがnum1Buttonであること)はInspect Objectを使って調べます。
driver.find_element_by_accessibility_id("num1Button").click()起動済アプリの操作
起動済みのアプリを操作する場合は、一旦Rootを操作して対象アプリのウィンドウハンドルを調べ、それを使って対象アプリを捕捉します。
desired_caps = {}
desired_caps["app"] = "Root"
driver = webdriver.Remote(
    command_executor='http://127.0.0.1:4723',
    desired_capabilities=desired_caps)

target_window = driver.find_element_by_name("電卓")
target_window_handle = hex(int(target_window.get_attribute("NativeWindowHandle")))

desired_caps = {}
desired_caps["appTopLevelWindow"] = target_window_handle
driver = webdriver.Remote(
    command_executor='http://127.0.0.1:4723',
desired_capabilities=desired_caps)driverが取得できれば後は同じです。
おまけ
AnacondaからWinAppDriverの開始処理と終了処理を実行する
関数を定義
WinAppDriver起動準備で紹介したコマンドをPythonから実行する関数を定義
import re
import socket
import subprocess
import time

reg_key  = 'HKEY_LOCAL_MACHINE\SOFTWARE\Microsoft\Windows\CurrentVersion\AppModelUnlock'
reg_name = 'AllowDevelopmentWithoutDevLicense'
reg_type = 'REG_DWORD'

def check_port(host='127.0.0.1', port=4723):
    s = socket.socket(socket.AF_INET, socket.SOCK_STREAM)
    r = s.connect_ex((host, port))
    s.close()
    return r == 0

def select_allow_development_without_dev_license():
    result = subprocess.run(['reg', 'query', reg_key, '/v', reg_name], check=True, encoding='utf-8', stdout=subprocess.PIPE)
    return re.sub(r'\n|\r', r'', re.sub(r' +', r' ', result.stdout)).split(' ')[-1]

def update_allow_development_without_dev_license(value=0):
    subprocess.run(['powershell', 'start-process', 'cmd.exe', f'"/c reg add {reg_key} /v {reg_name} /t {reg_type} /d {value} /f"', '-verb runas'], check=True, shell=True)

def exec_win_app_driver():
    subprocess.run(['start', 'WinAppDriver'], shell=True, cwd='C:/Program Files (x86)/Windows Application Driver')
開始処理
開発者モードを有効化しWinAppDriverを起動
なお、WinAppDriverはコマンドプロンプトで起動させるので、終了する場合はコマンドプロンプト上でEnterを押す。
if (select_allow_development_without_dev_license() == '0x0'):
    update_allow_development_without_dev_license(1)
    time.sleep(1)
    print(f'update_allow_development_without_dev_license:{select_allow_development_without_dev_license()}')

if (not check_port()):
    exec_win_app_driver()
    print('exec_win_app_driver')
終了処理
WinAppDriverが停止していることを確認し開発者モードを無効化
if ((not check_port()) & (select_allow_development_without_dev_license() == '0x1')):
    update_allow_development_without_dev_license(0)
    time.sleep(1)
    print(f'update_allow_development_without_dev_license:{select_allow_development_without_dev_license()}')
参考
SeleniumおよびAppiumの構成についてわかりやすくまとめて下さってます